
Version used : Photoshop CC 2019
Updated: Nov. 2019
Nonstop Printing
Download Images and Photoshop file used in this tutorial (36MB)
I. Create New Document
II. Artwork Setup
III. Silver Setup
IV. Varnish Setup
V. Save as PDF
VI. Send to Print
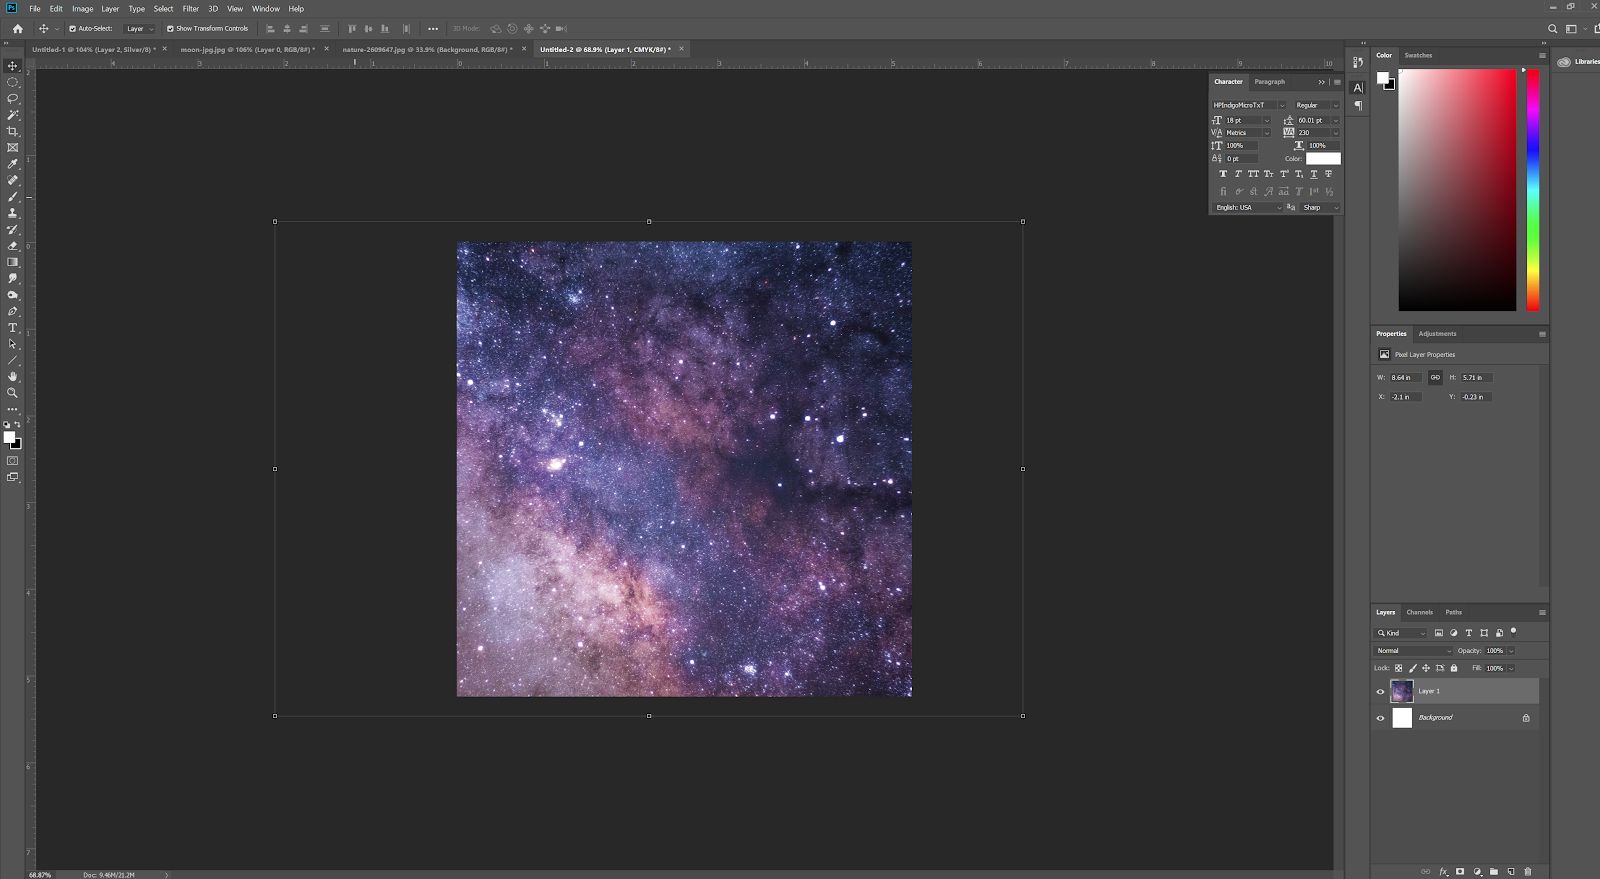
Create a New document in Photoshop
5.25 x 5.25 inches
300 ppi
Cmyk
8 bit

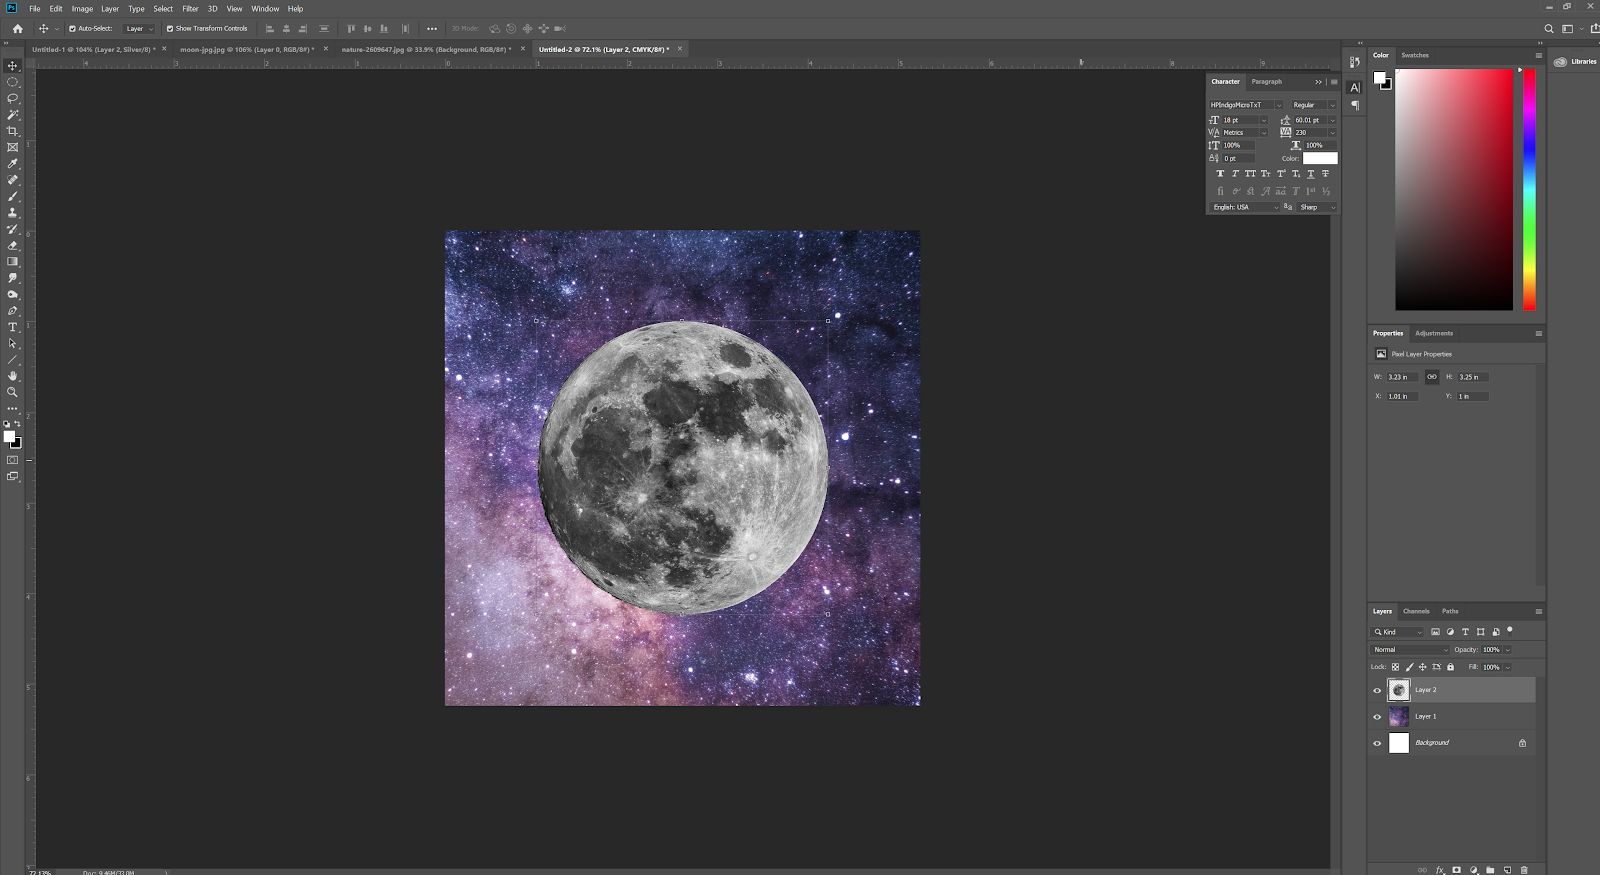
2. Copy and Paste and Resize Moon onto a New Layer
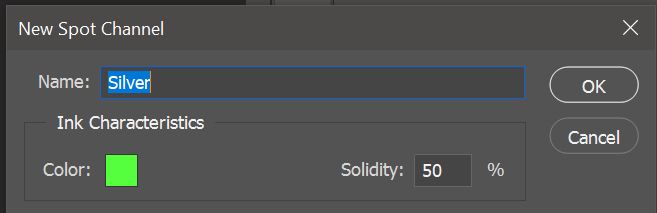
3. CHANNELS Hamburger menu -> New Spot Channel…
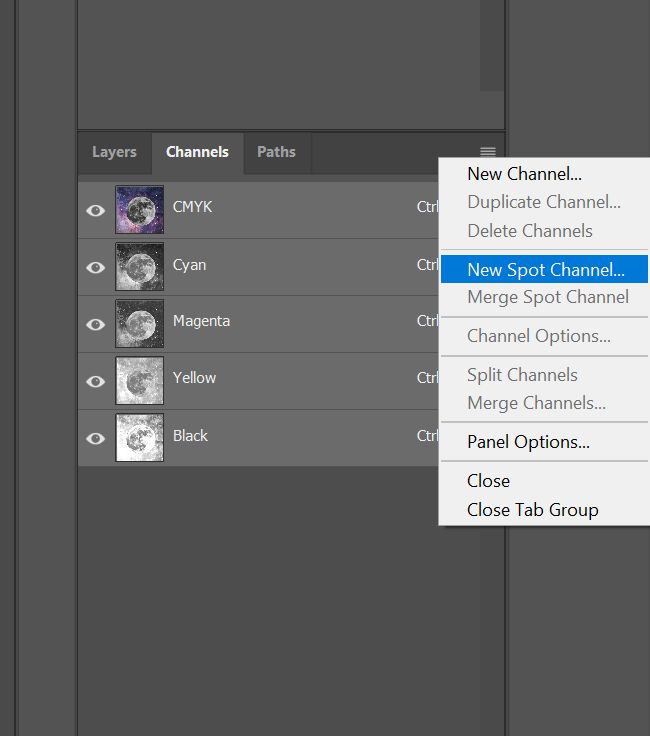
Name the channel “Silver” without the quotations. Must be a Capital S
The color and solidity doesn’t matter when printed and is only for on-screen viewing.
Recommend picking a color that can differentiate itself from your artwork
Solidity will change the opacity of the channel when viewed on a computer screen.
4. After creating your Silver Channel, you want to create a Silver underlay where CMYK will be
printing. Without the Silver underlay, CMYK will not be visible on black paper
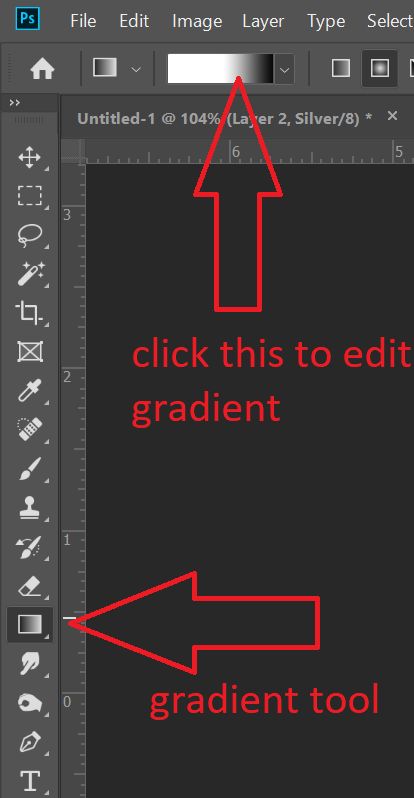
To do this, either paint in where you want the Silver underlay to be with a black brush, or in this
case, if you want the background to fade out as it gets closer to the moon, use the gradient tool/
editor and adjust the settings so that eventually you have something that looks like this:
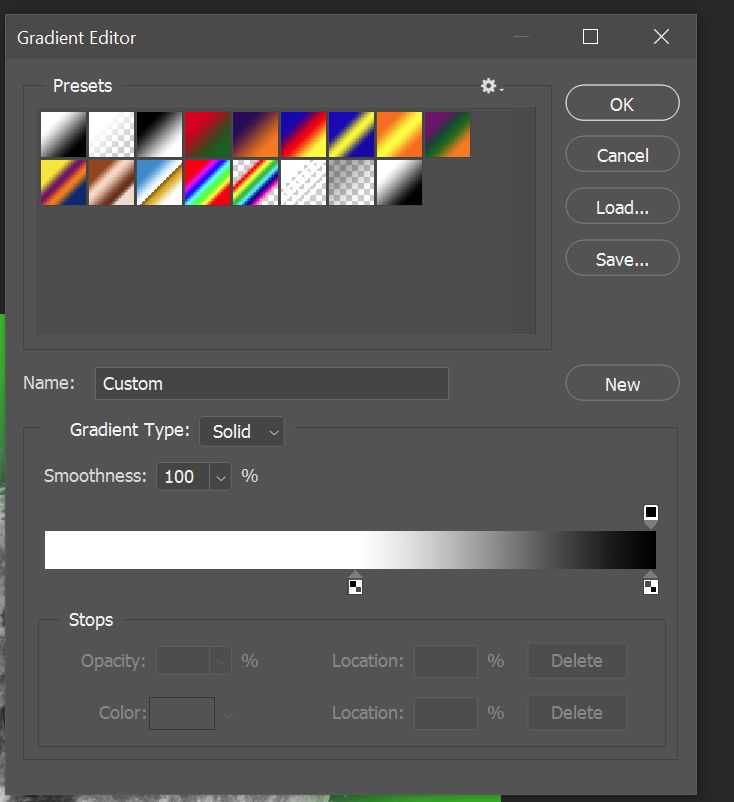
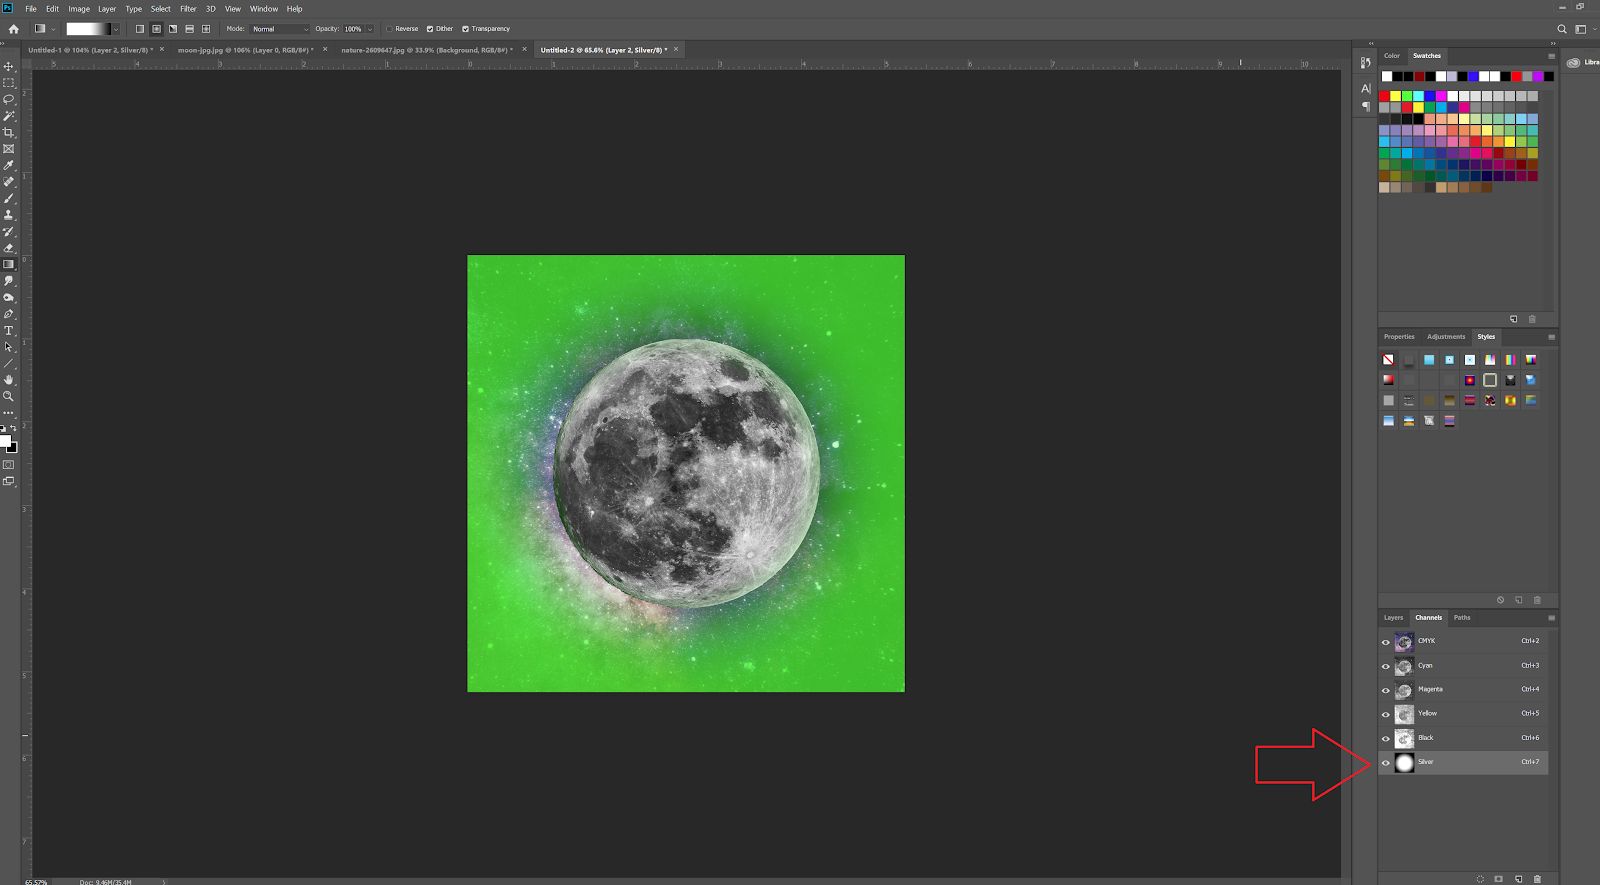
Black is 100% Silver, White is 0% Silver. Greys are in the middle.
When printing on Black paper, we recommend using 100% Silver for most of the Silver underlay
Gradients can be unpredictable and the difference between 0%, 1%, or 2% Silver may
create noticeably separated areas. We recommend using a more gradual gradient than
shown in this guide
Select the Silver Channel and create your underlay
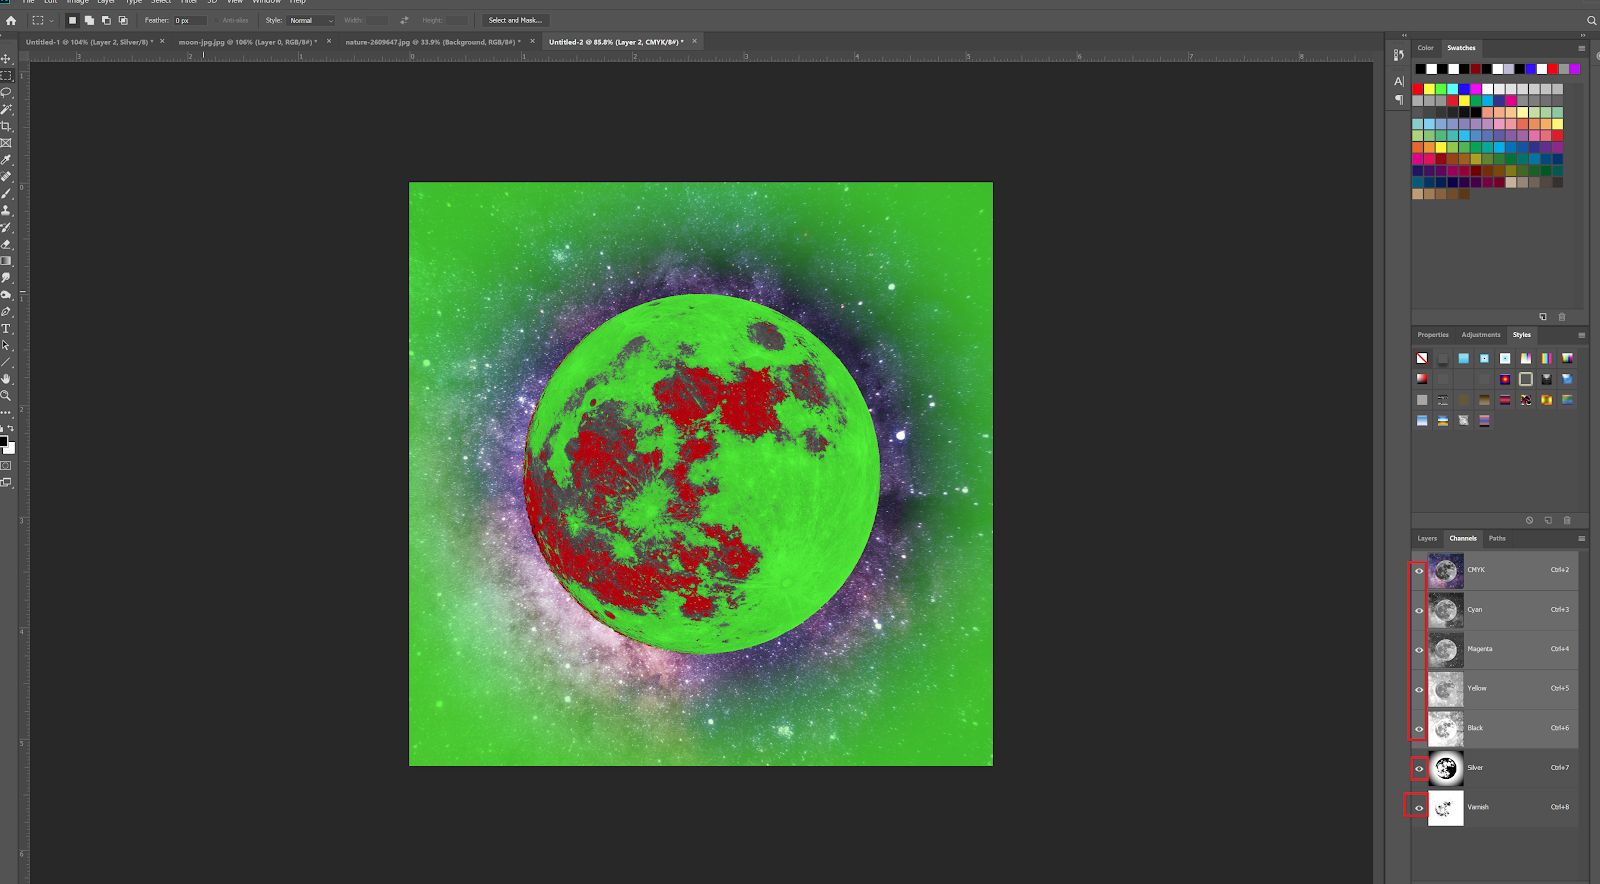
5. Painting the Silver Moon
-Be sure in LAYERS your Moon layer is selected. Now select the CMYK Channel
-Use Magic Wand tool (I set the Tolerance to 50) and select some of the bright parts of the
moon
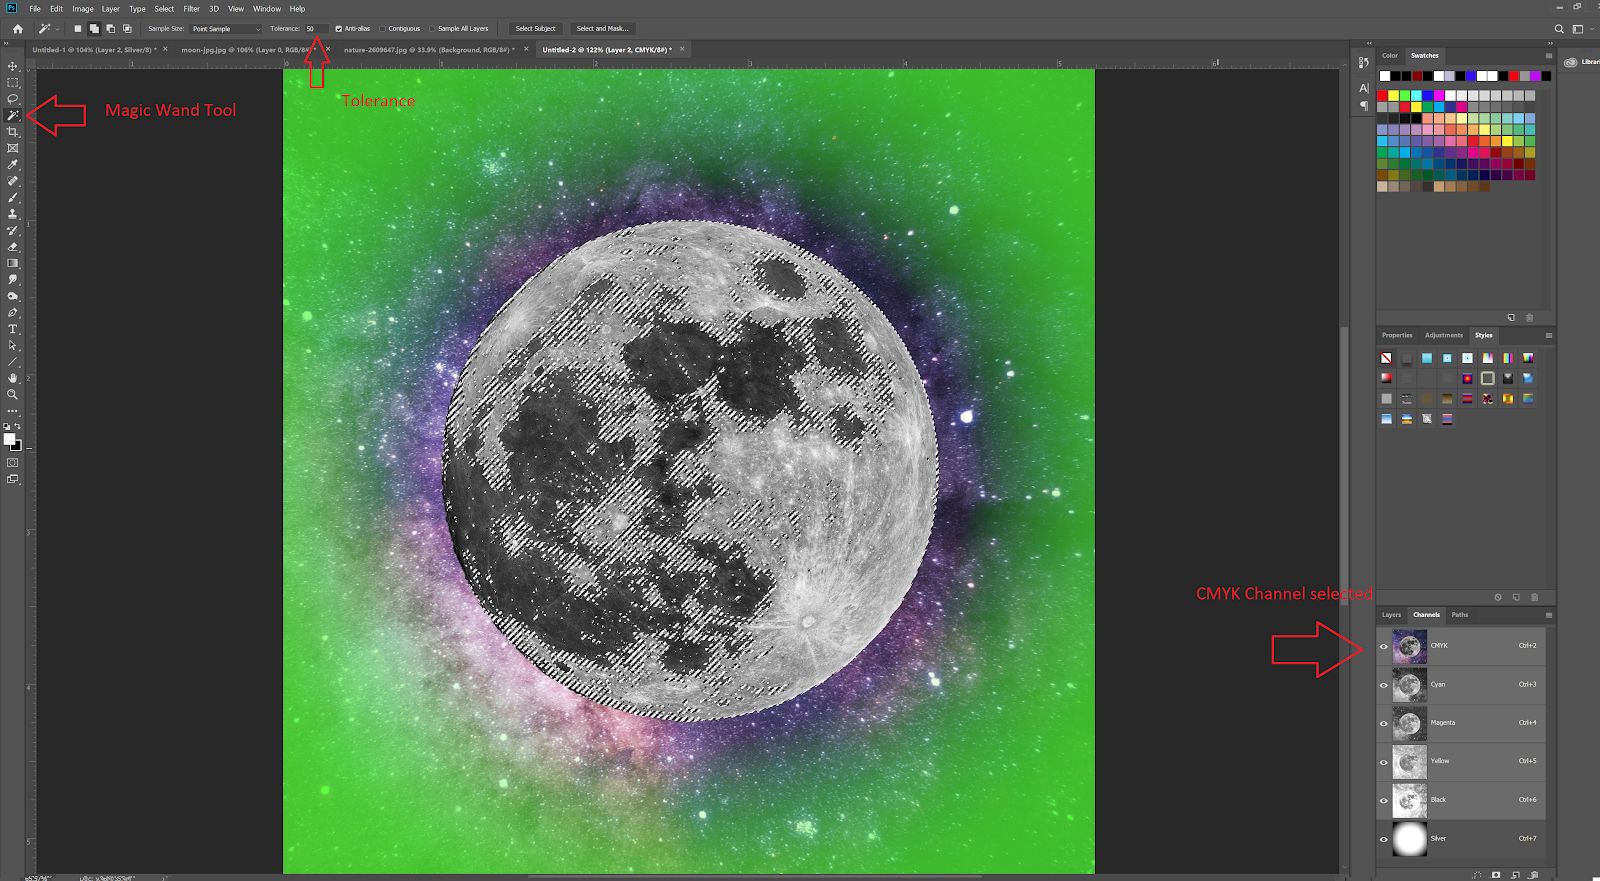
-Select the Silver Channel with your current magic wand selection still active
-Paint black into your selected areas.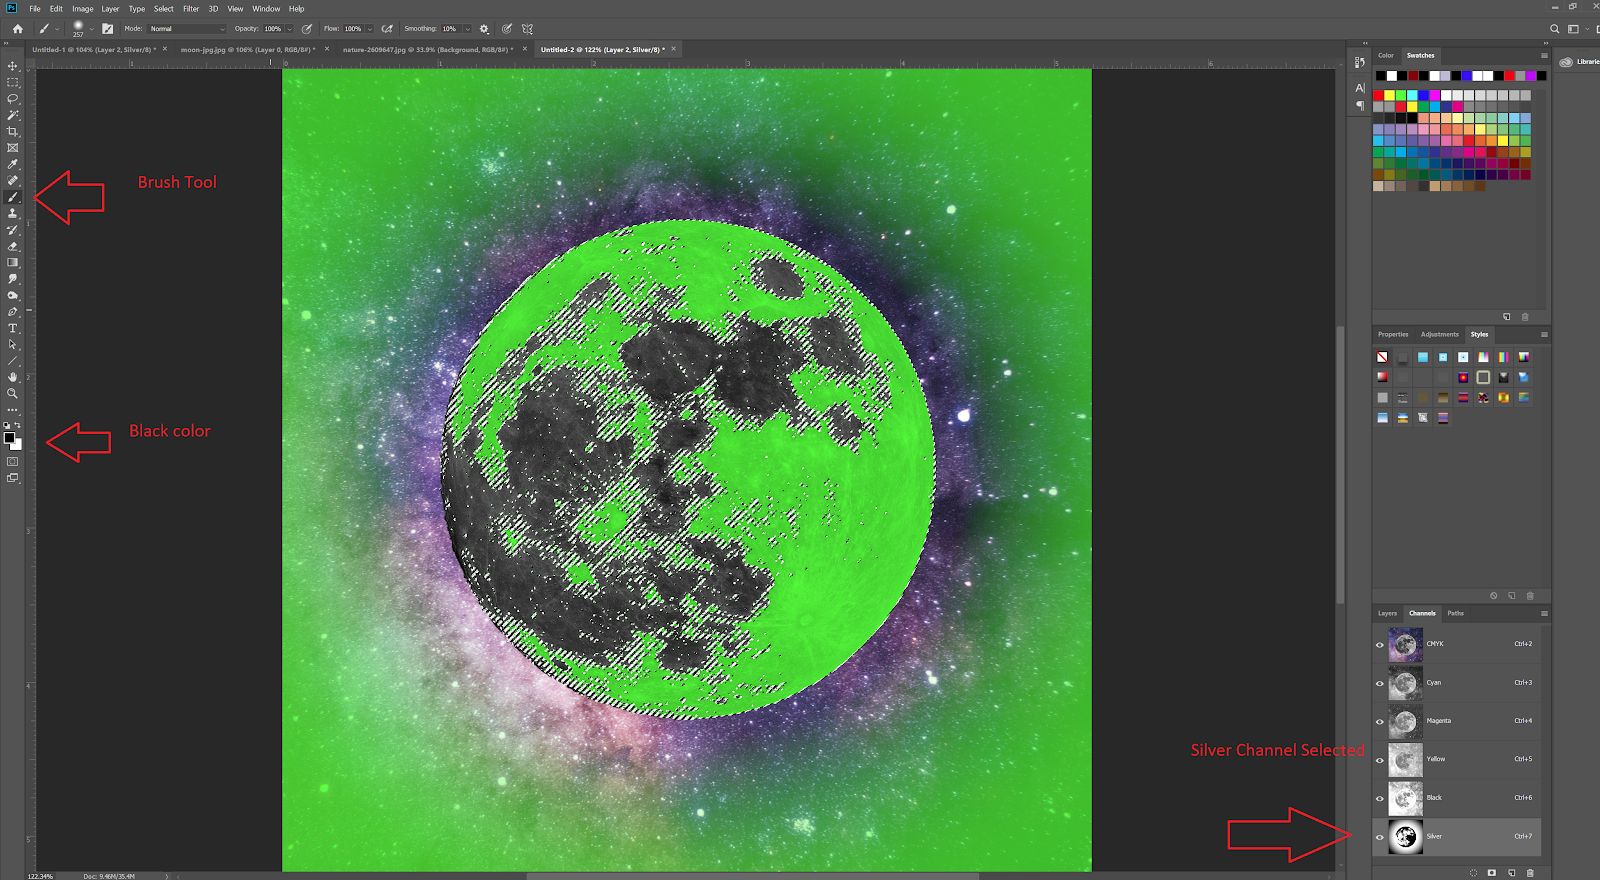
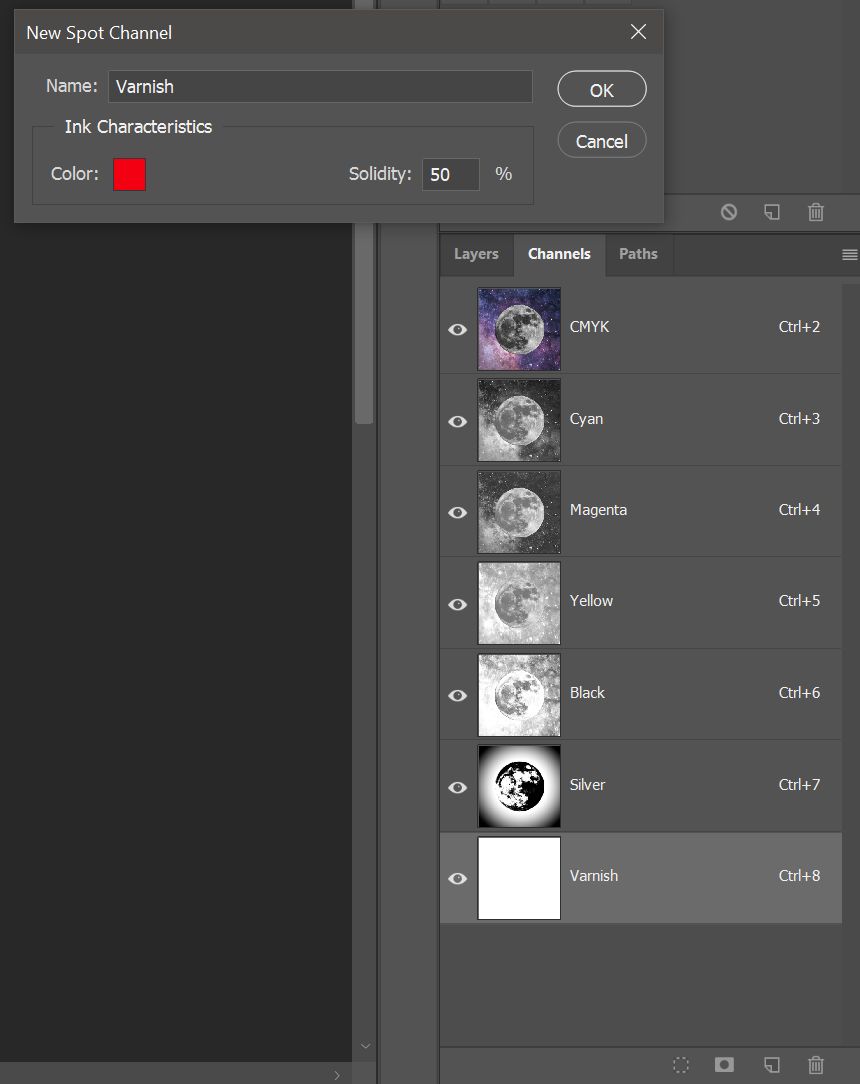
-Channel Hamburger Menu -> New Spot Channel named “Varnish” without the quotes.
Must be a Capital V
-Make it a different color than the Silver so you can differentiate it on your computer screen
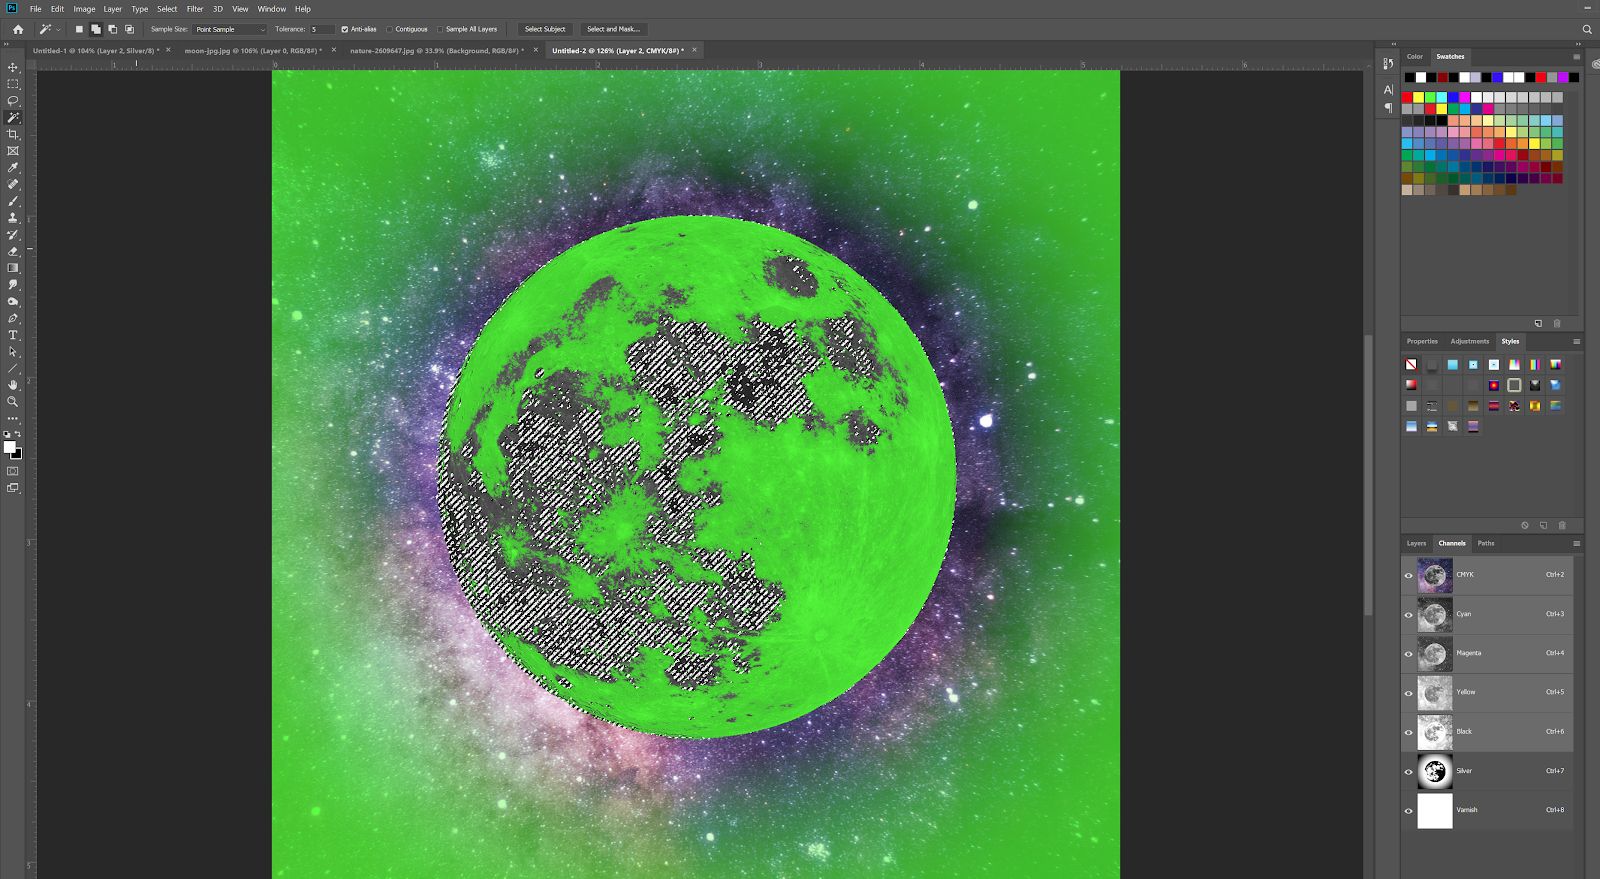
6. Follow similar steps to the Silver except this time, select the darker parts of the moon on the
CMYK
I used a magic wand tolerance of 5
Go to the Varnish Channel, and color it in with a black brush
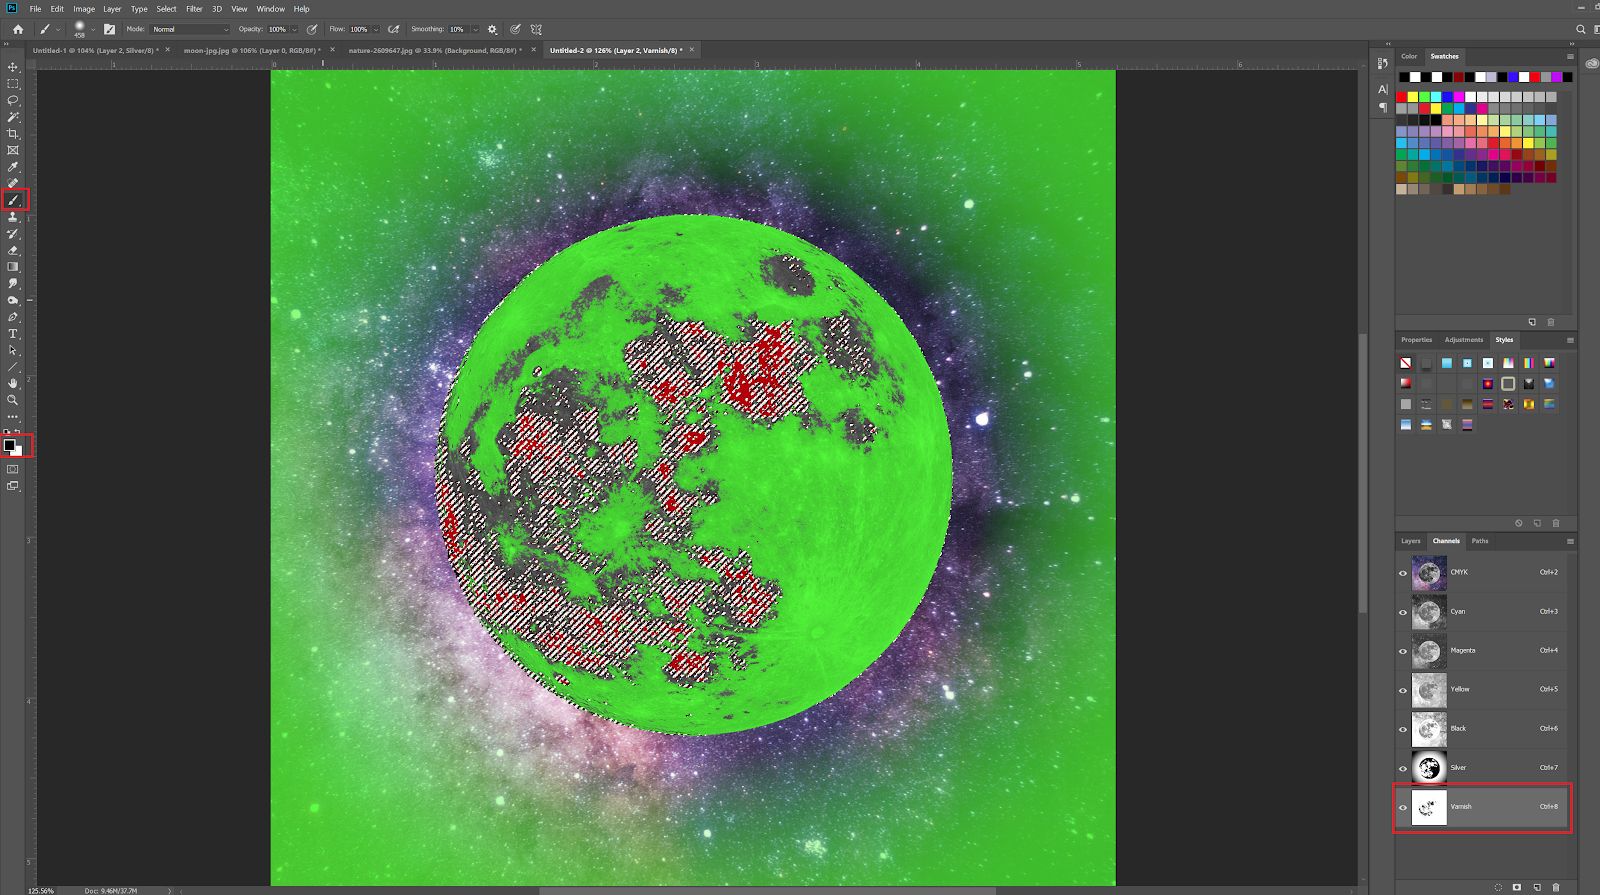
You can view and unview your Varnish/Silver Channels to see how it looks.
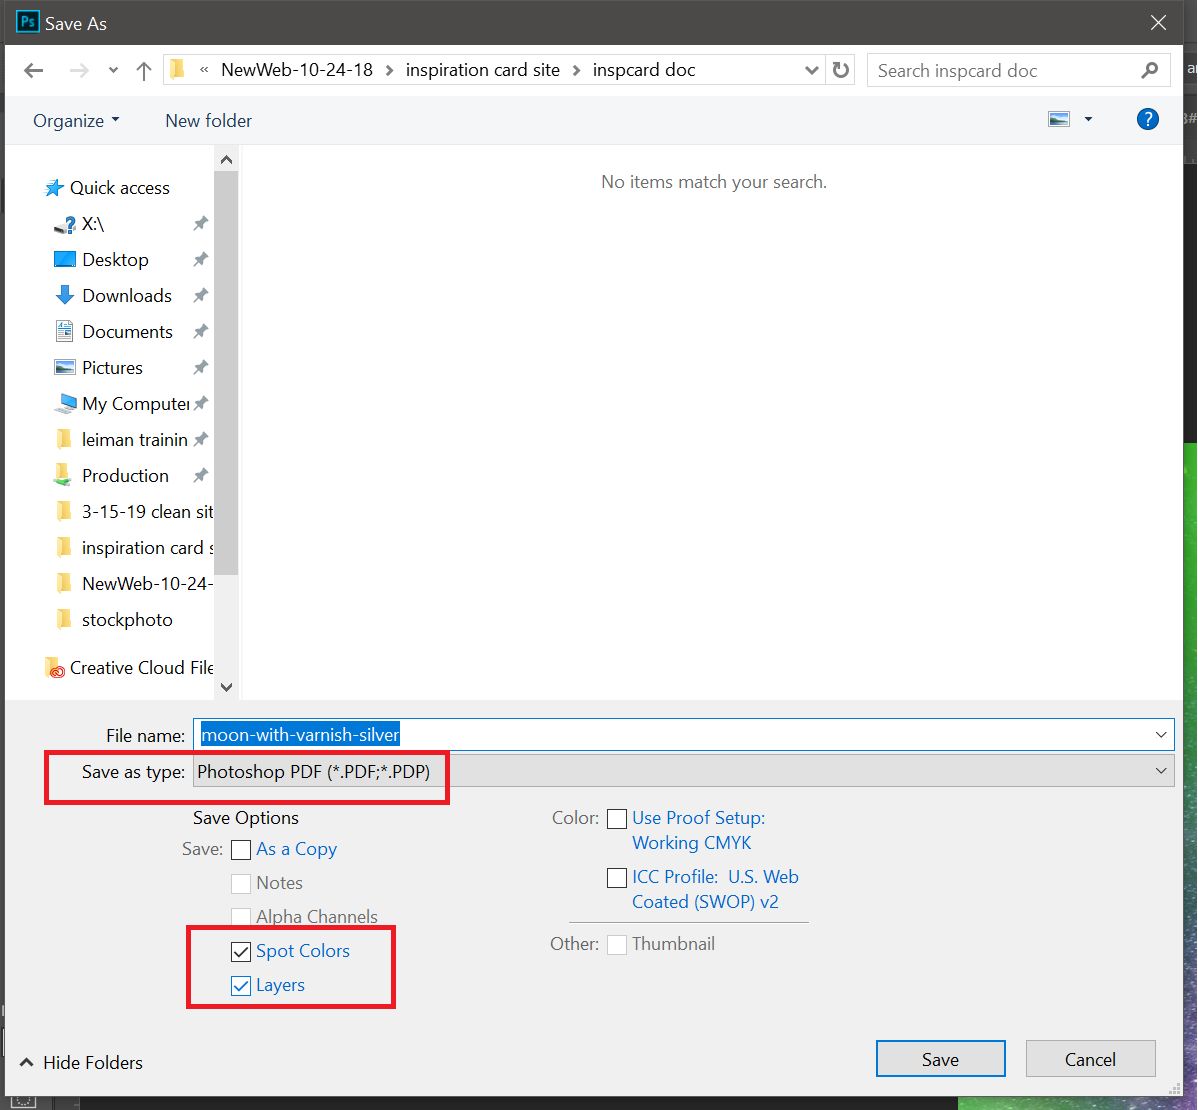
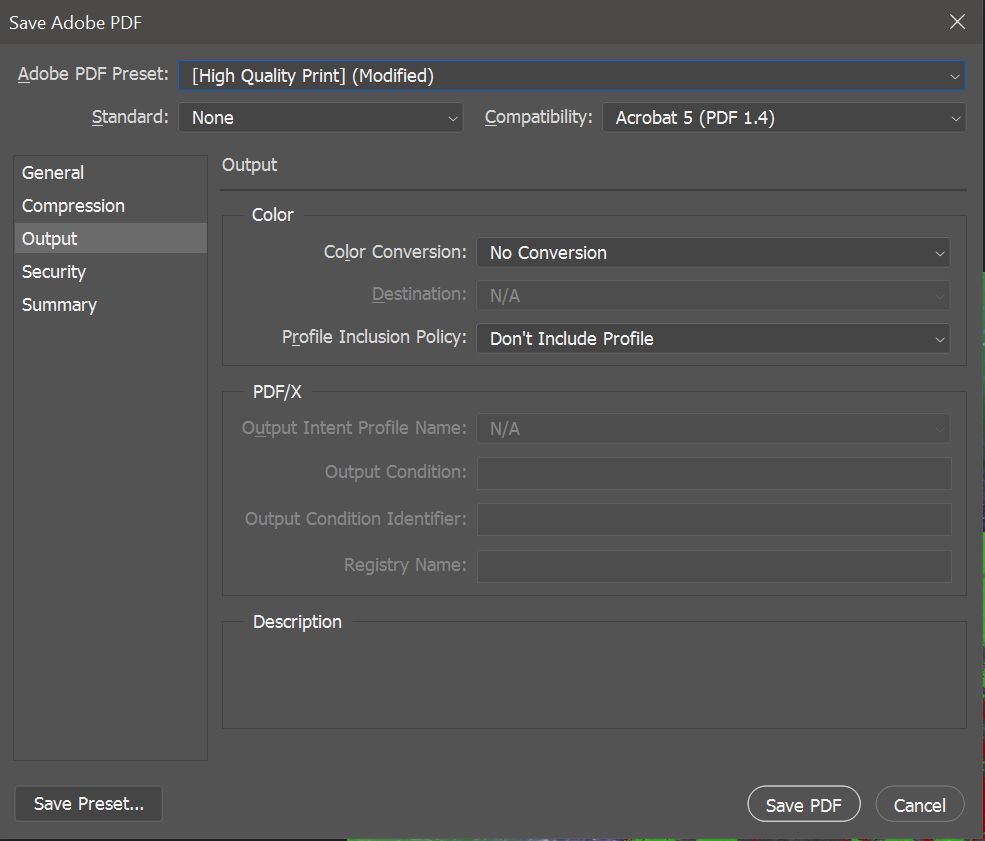
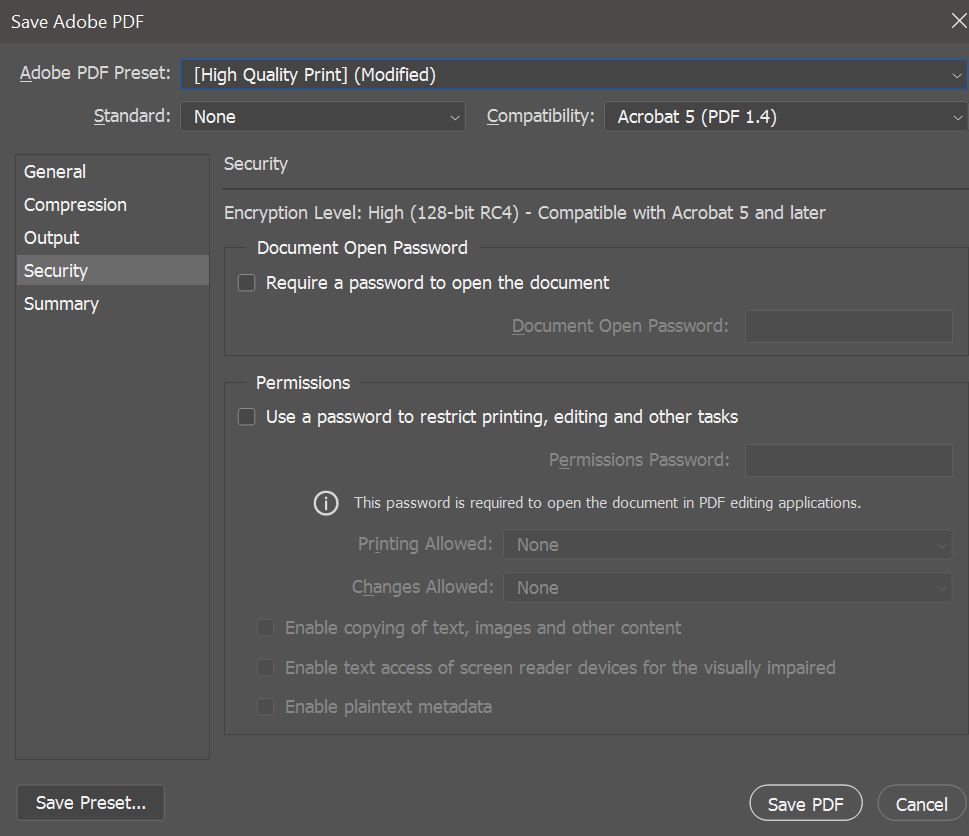
7. File -> Save As
-SAVE AS PDF
-Make sure ‘Spot Colors’ and ‘Layers’ is checked
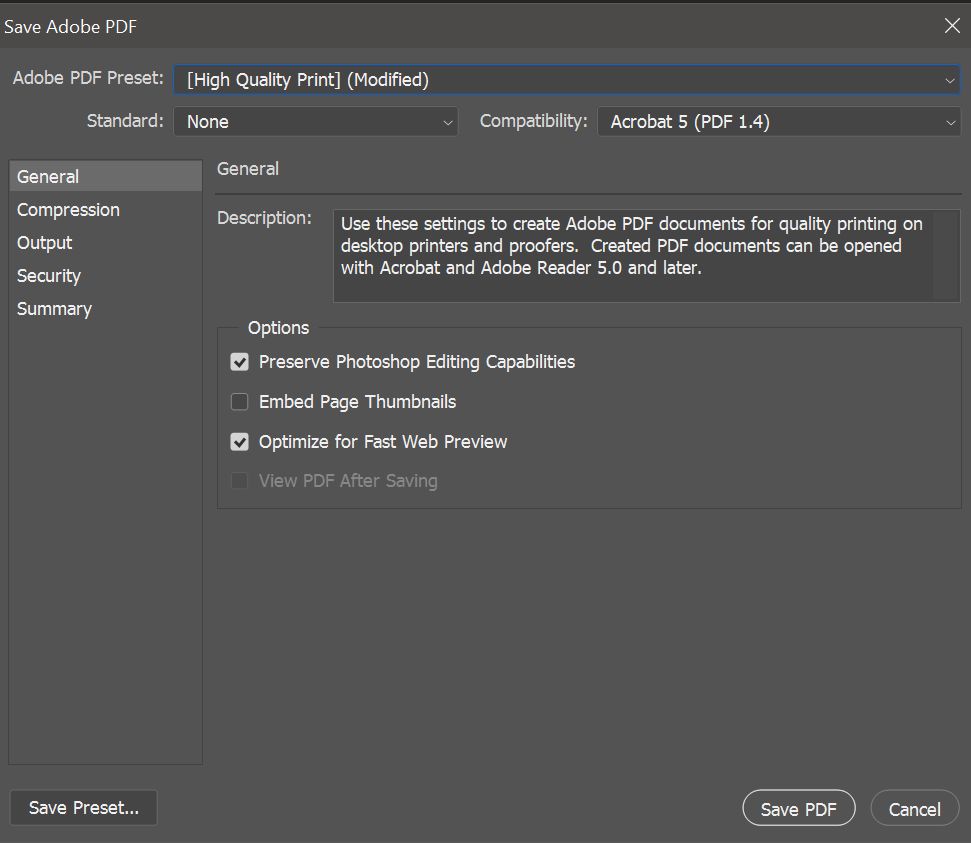
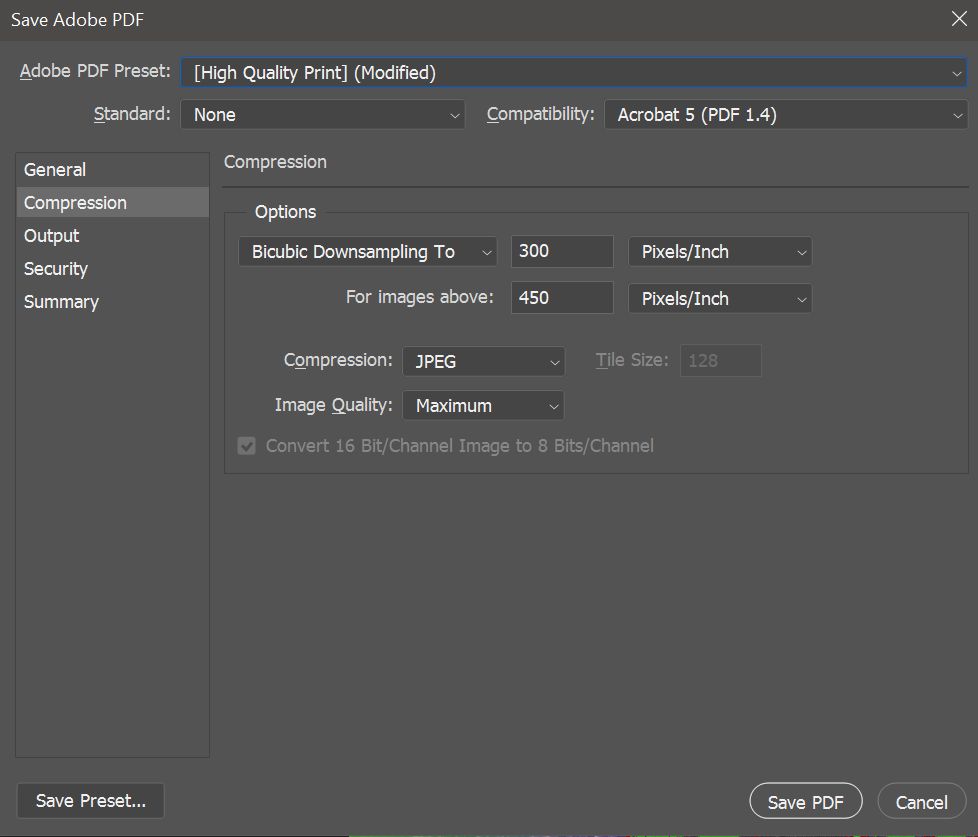
Select High Quality Print. You can compare to my settings below
Standard: none, Compatibility: Acrobat 5
General
Compression
Output
Security
Click ‘yes’ through the dialogues.
Navigate to Nonstop Printing Inspiration Card. Click ‘Customize’
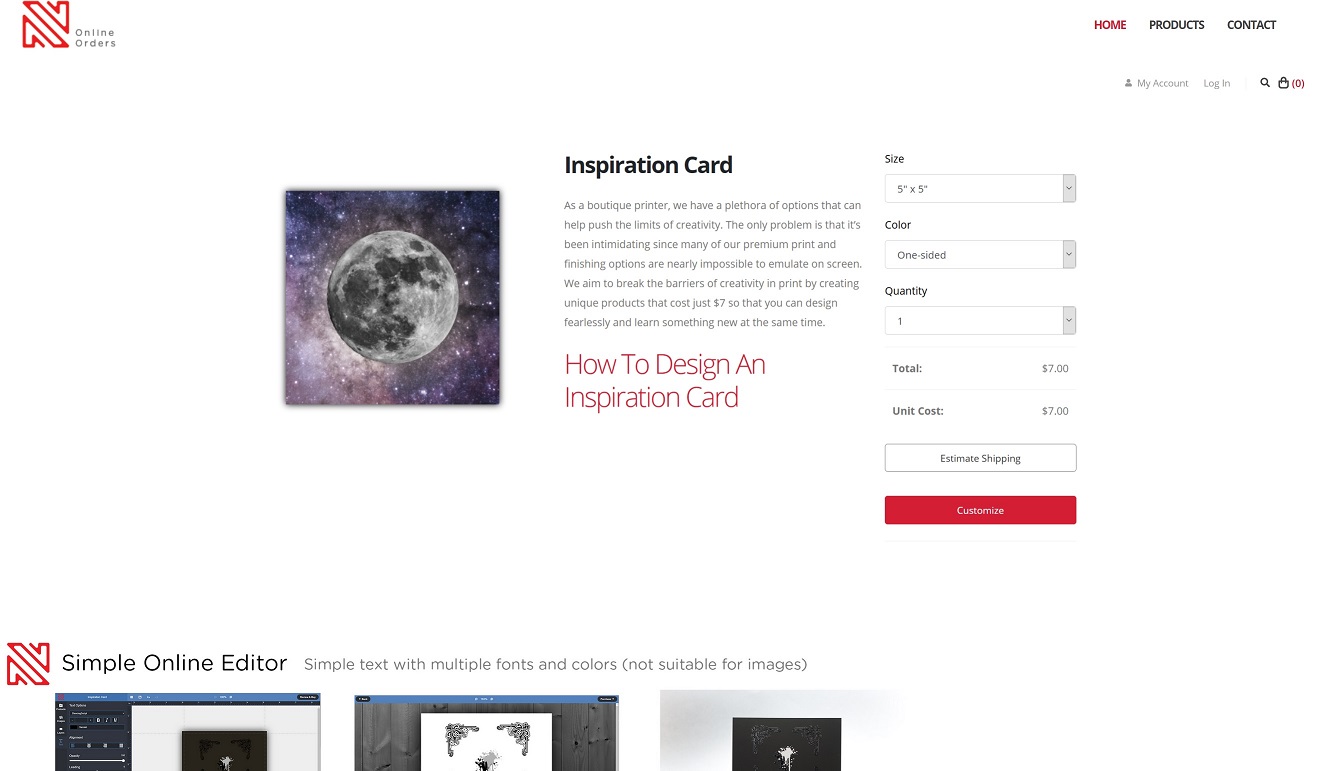
Delete Sample Text
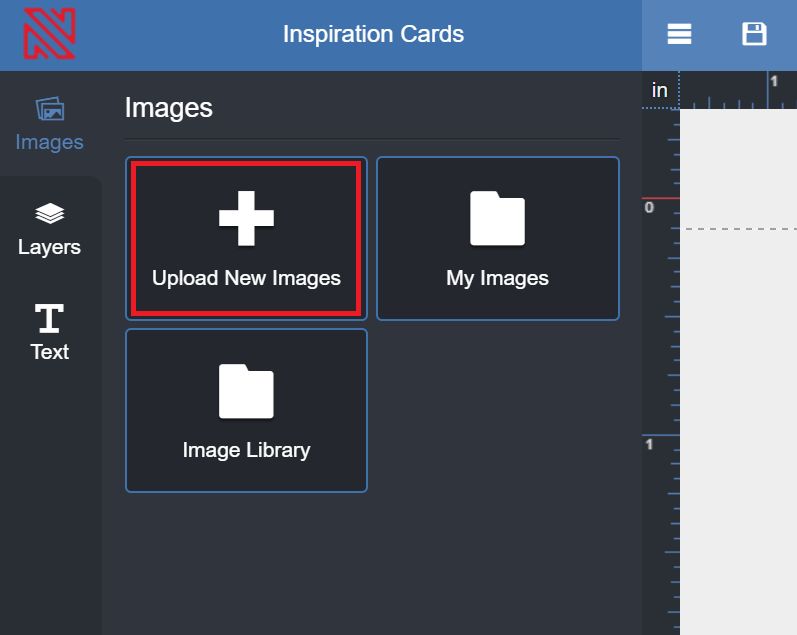
Images > Upload New Images
Find and upload your 1-page pdf you just saved
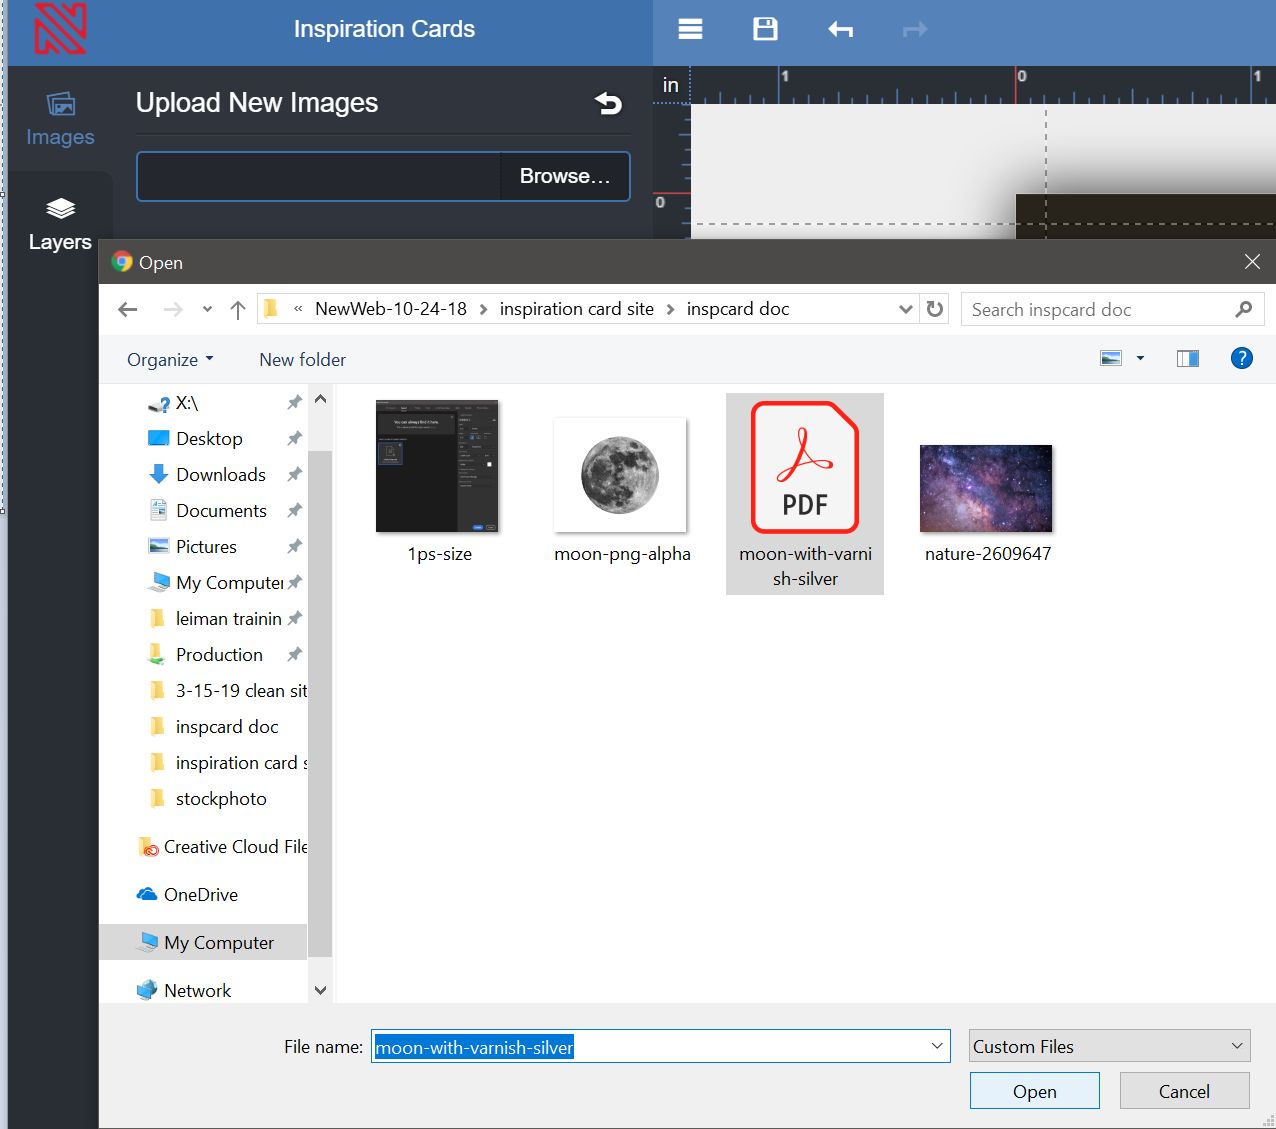
Wait for file to upload (might take a few minutes)
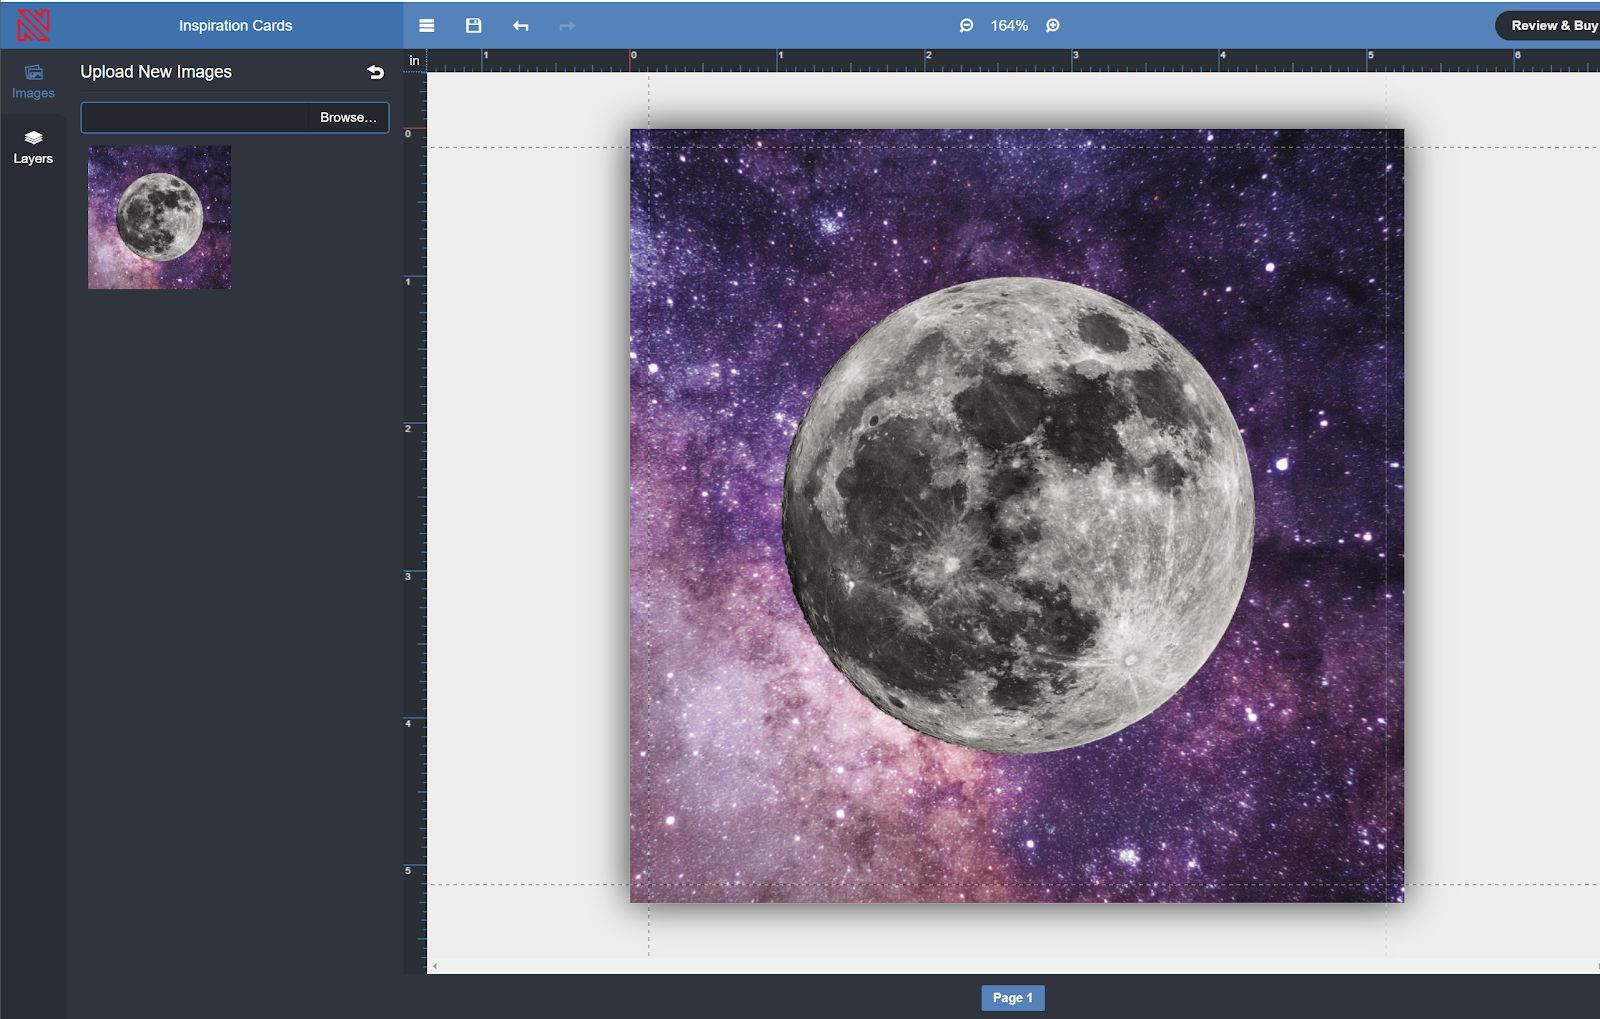
Click image to place onto page. Should fit perfectly without needing to edit anything
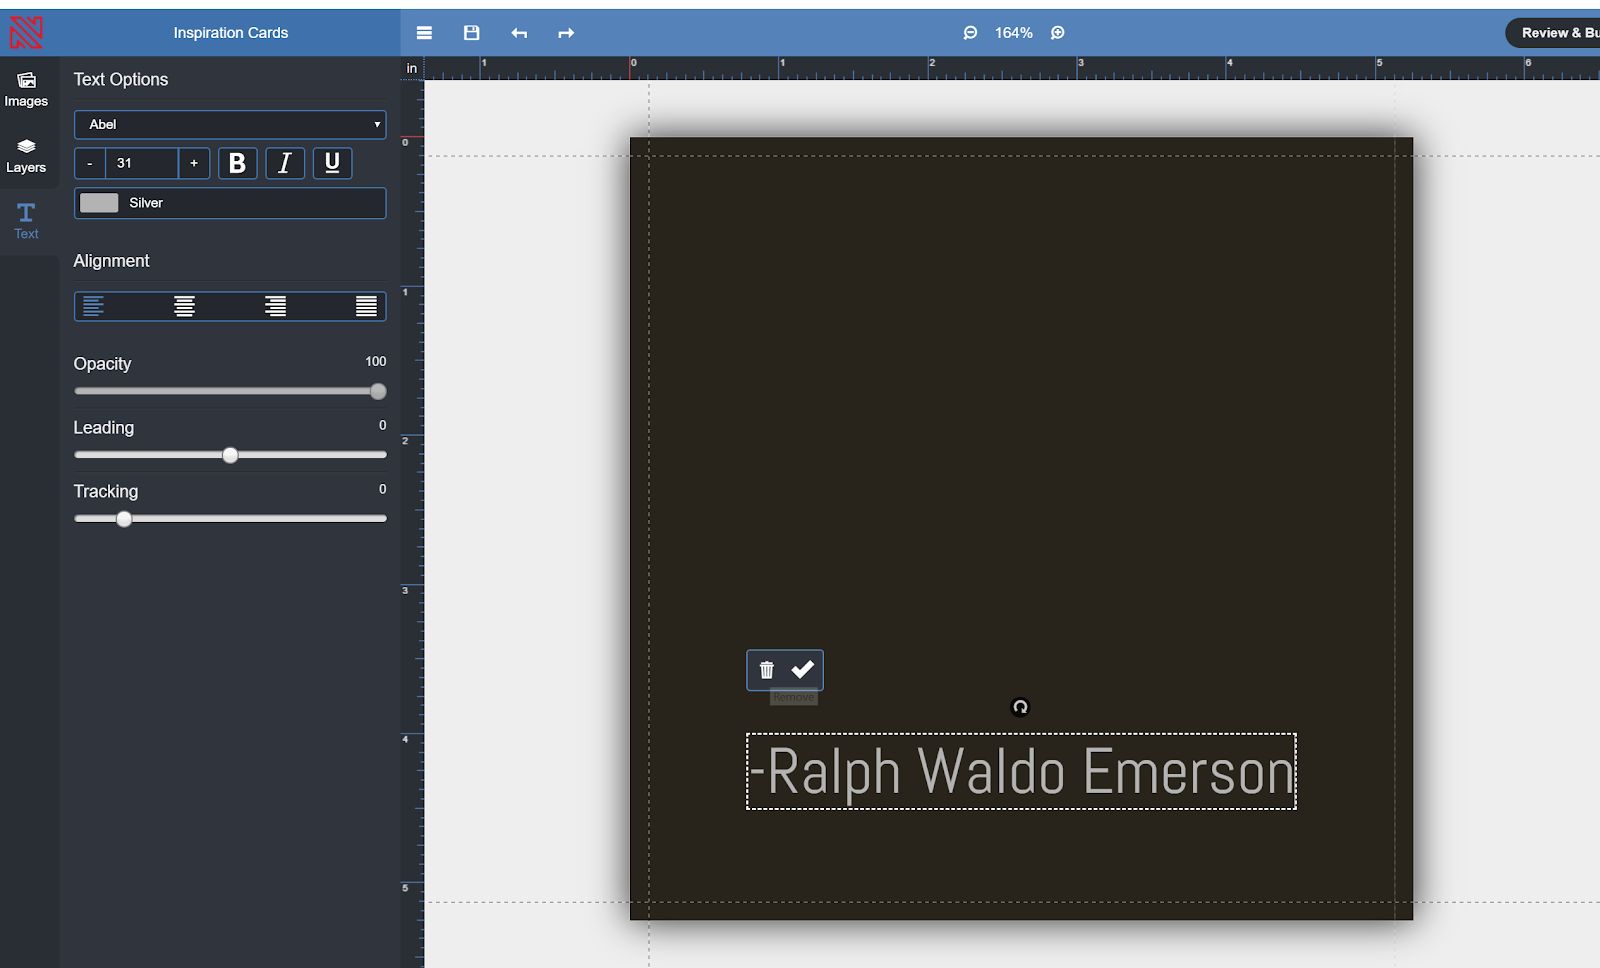
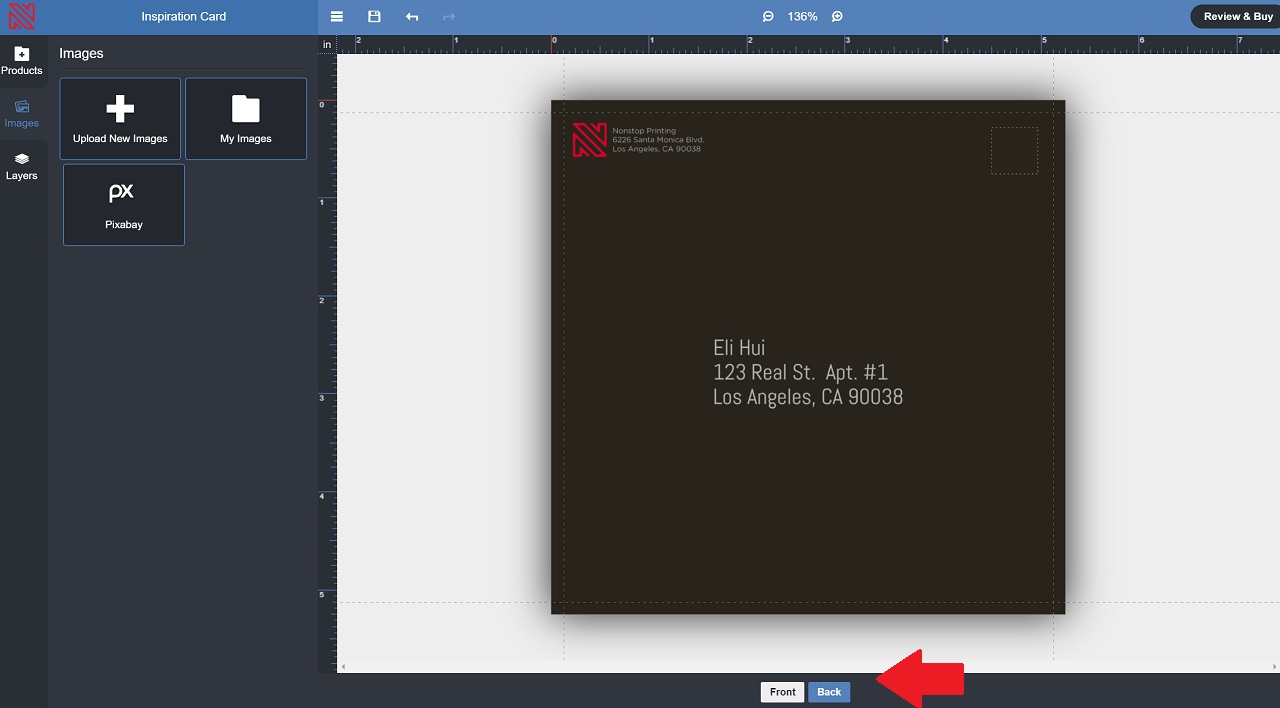
Navigate to Back side and fill out your Address
Click:
Review and Buy > Purchase
-Create New Account/ Log in
-Fill out payment and shipping info and send order in
Done!
Real custom printing for people that know that presentation matters.
Open from 9am – 6pm | Monday – Friday
MEET NONSTOP PRINTING
Open for scheduled visits 11 am – 5pm Monday – Friday
Open for pickups and deliveries 9 am – 5:30 pm Monday – Friday
info[at]nonstopprinting.com | 323.464.1640
© Nonstop Printing, Inc. 6226 Santa Monica Blvd. Los Angeles, CA 90038