
We’re in the middle of revamping how we teach book making but this guide will help you get started!
Definitely not. If you’re already comfortable in InDesign then it’s not necessary. We do include some tips and tricks that may save you some time.
When you’re ready to place an order, we’ll go a 3 phase process so you can design the most efficiently and have the best product possible. Making great books takes teamwork and we’re excited to collaborate with you!
The elements on the right are critical in the success of your print project. We spend a lot of our time confirming these items so you can speed up the process by confirming these items before we do our double checks.
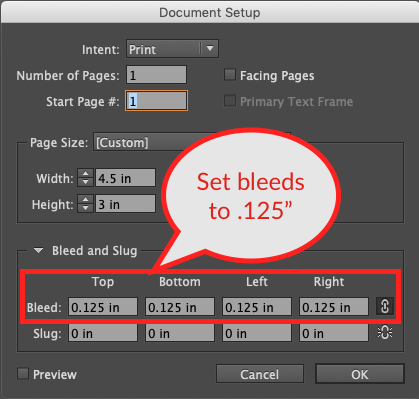
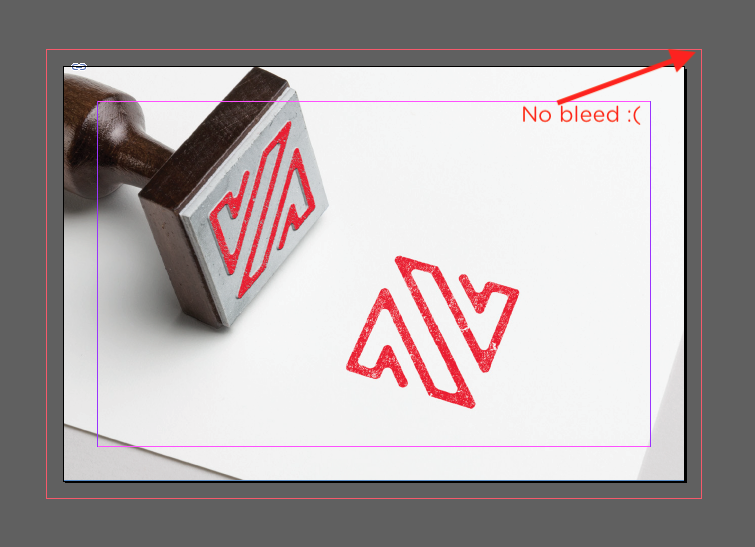
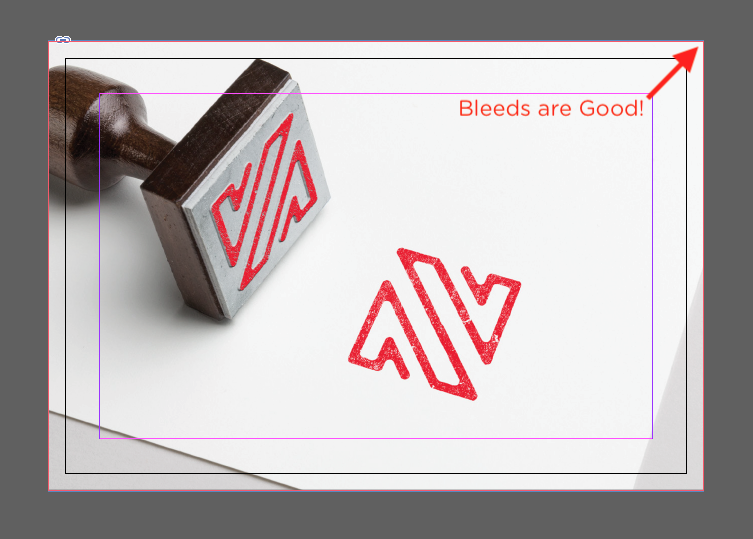
Bleeds consist of the area outside of te trim line that will get cut off, and while it ultimately gets removed it’s still important to the overall production of your product. As with any manufacturing product, there is movement from sheet-to-sheet so bleed helps eliminate this imperfection.
In InDesign, set your bleeds to .125″.
This is the area within the trim where any text, important parts of photos, logos, and other critical parts of your design should be kept, otherwise, it may get cut off.
In InDesign, set the margins for book projects to .25″.
This is the final size of your book.
In InDesign, put your desired final trim size in this section.
Our indesign template will help get you started in creating a great file. Click here to download.
We have built this template for you to set up your book files perfectly! Take a look at the steps on the left to get started.
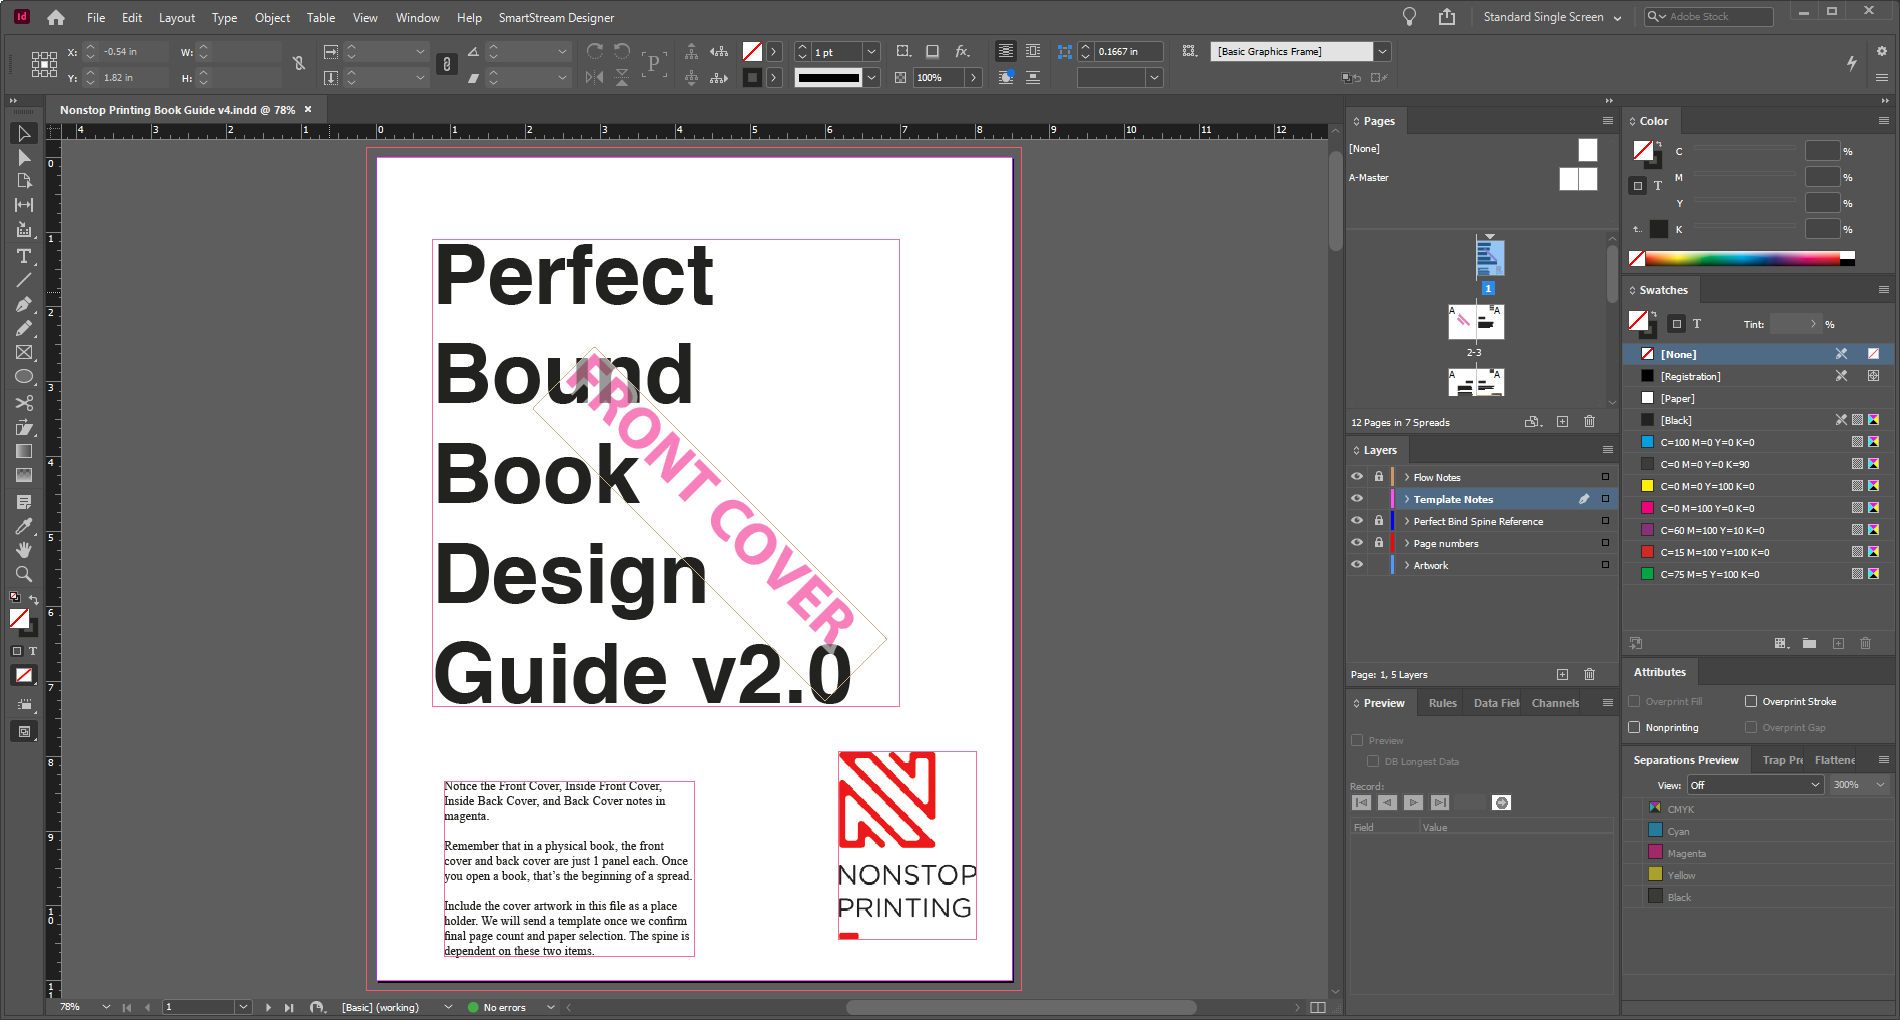
A Master Page is a nonprinting page that you can use as the template for the rest of the pages in your document. Master pages can contain text and graphic elements that will appear on all pages of a publication (i.e. headers, footers, page numbers, etc.)
InDesign layers are document-wide. When you create a layer, it is available on every page in the document, including the master pages. When you hide or show a layer, all pages in the document are affected by this change.
Bleeds: the red line in your document. If you do not want white boarders, then make sure to place background art all the way to the red line.
Margins: the purple line in your document. Place critical artwork in this area that you do not want cut off. We’ve also added extra space in the spine area so that you can make sure your critical art is always easy to read.
Trim: This is the white area of the document. This is what your final document will look like after we trim it down. Press “w” on your keyboard to give a nice preview of your work.
The best custom books start with a great conversation. We’ll help demystify the print process so you can choose the best method for your proejct.
Open for scheduled visits 11 am – 5pm Monday – Friday
info[at]nonstopprinting.com | 323.464.1640
© Nonstop Printing, Inc. 6226 Santa Monica Blvd. Los Angeles, CA 90038
We use cookies to ensure you get the best experience on our website. By continuing, you accept our use of cookies.